In the world of competition barbecue, there's a saying: “It's not the cooker, it's the cook.” That means that in a blind tasting, you can't tell if the end result was cooked in a modern commercial-grade smoker, or in an ad hoc, BBQ pit made from a stack of cinder blocks and a sheet of plywood for a lid. It really comes down the the cook's ability to control the heat and smoke inside a cooker.
Today, we'll show you how turn a 55-gallon steel drum into a very rudimentary yet effective home-made smoker called an Ugly Drum Smoker, or UDS for short.
]
Pros:
- Appeals to the do-it-yourselfer who wants a save a little money. The cost of the build will vary depending on your resourcefulness and handyman skills. By the time you're done, you can easily spend $200 in parts for this DIY project.
- Has a high capacity for its size.
Cons:
- There's nothing pretty about it. Ugly isn't even its middle name, it's the first name.
- This is a dedicated smoker. It won't work well as a grill.
- If you pursue a more complex variation, you can spend as much money as Weber's 22.5″ Smokey Mountain cooker, which has the same capacity as a UDS and is a ready-made, good-looking piece of equipment with an internet price of $350.
Why an upright layout instead of a horizontal layout that's sliced in half, you ask? By keep the metal cutting to a minimum, it leaks less air than a drum sliced in half lengthwise. Less air leakage means it's easier to control your fire and the
temperature in your smoker.
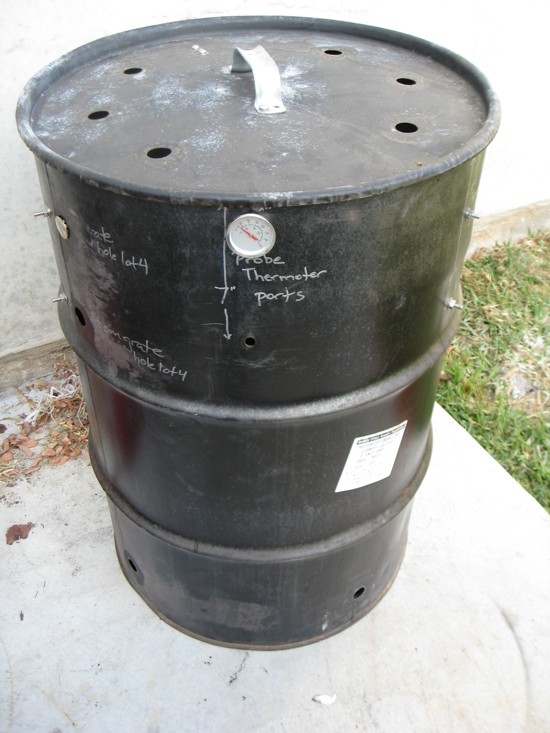
Any wood-and-charcoal-burning smoker works on the principle of flame + airflow = heat. Your task as a pit builder is to create enough air intake vents and exhaust vents to give a clean, controlled combustion, and and a method to fine-tune those vents to regulate the airflow.
[
This week, we'll start by gathering some tools, and the steel drum.
You'll need:
Power drill
1″ hole saw (to cut vent holes)
Various drill bits
Cutting oil
Eye protection
Step drill bit (optional, but is nice to have)
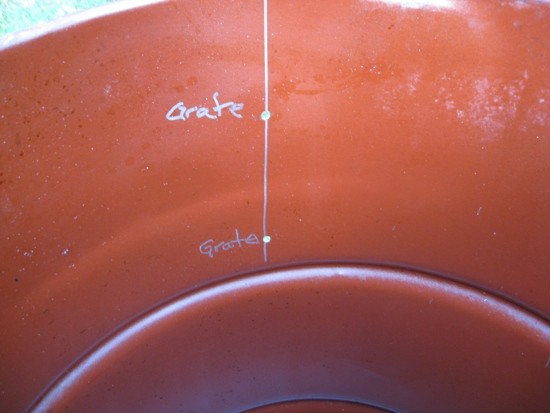
You'll want a 55 gallon drum because it's diameter is 23 inches, or exactly the right size to fit a food grate from a 22.5″ Weber kettle grill. Since replacement grates are easy to find at most any hardware store, as are many of the nuts and bolts we'll use, the trickiest parts of the project are finding an appropriate drum and fabricating a charcoal basket.
Steel drums come in several styles: closed heads that are welded on both ends, or open head, which lift off on one end. You want the open head style.
Drums may be lined on the inside with either a soft plastic film or a hard epoxy liner. Or it might not be lined at all if it held petroleum products. Food-grade drums typically have an hard epoxy liner to protect the steel from corrosive ingredients like lemon juice concentrate, and you want to remove that liner before you cook in it.
How? That epoxy liner-of-death is tough stuff. You stick you head in the barrel and go to work with an angle grinder for a couple of hours, and still not manage to remove it all. Or you can pay someone to sandblast the inside for $40. Precision Powdercoating in Santa Ana has sandblasted three of my drums, and they do a fine job.
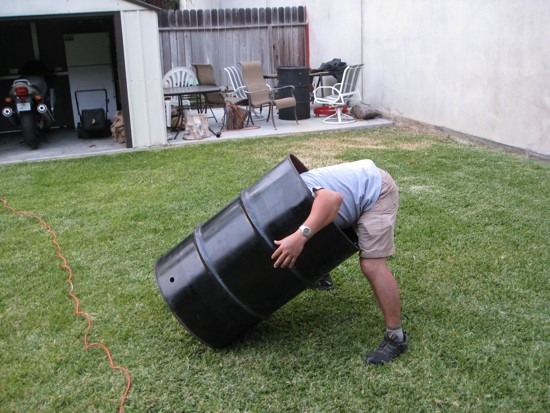
The challenge of a UDS build is to find a used drum for next to nothing that's not dented, with a lid that fits just so. You don't want to struggle to seat or to remove the lid. Typically, you can have two of the three. Cheap used drums are usually beat to hell, and drums that are in great condition usually cost some money.
You can find used 55 gallon drums for $15 on Craigslist, a $40 reconditioned, unlined drum from Ditty Container of South El Monte, or drive to Santa Fe Springs to buy a brand new drum starting at $85 from McMaster-Carr. Factor in your time and gas driving around, the cost of sandblasting an epoxy-lined drum, and you may be better off buying a new, unlined drum, but let your budget decide.
Next time: we'll get into the other parts you'll need and the actual build itself.
The author is an award-winning BBQ Pitmaster and teaches Smoking 101 classes. Details on professorsalt.com
Follow Stick a Fork In It on Twitter @ocweeklyfood or on Facebook!