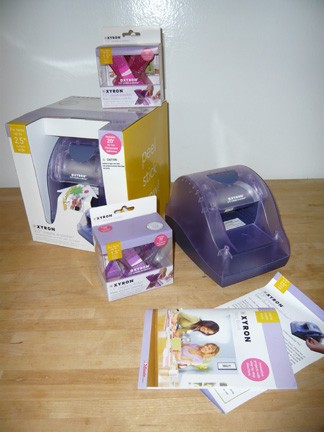
Remember a couple of months ago when I showed you some fun trinket boxes you could make with Xyron's 1.5″ Create-a-Sticker sticker maker? (Click here to see the how-to.) I had a chance this weekend to try out their 2.5″ Create-a-Sticker machine and came up with a few ideas for quickie crafts you could make as gifts for the holidays. And thanks to Xyron, eight lucky readers will win free sticker makers this week!
After the jump, let's get crafting!
]
The premise of the 2.5″ Xyron Create-a-Sticker is the same as the 1.5″ model–put something small and relatively flat through one end of the machine, and it comes out the other end with adhesive on the backside. It's perfect for fabric, paper, and a slew of other items that are as thin or thinner than a nickel.
We have a pointsettia tree outside our house, and I thought it'd be fun to do something with a few of the petals from the just-blooming flowers.
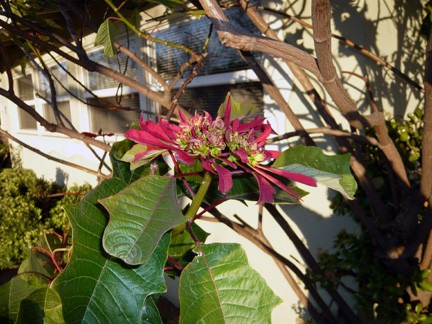
The only thing I would've done differently on this holiday card? Try drying out the petals a little before you make it–the white oozy stuff that comes from inside the poinsettia plant when you pick the petals off tends to get everywhere. Also, beware when handling this plant–it's poisonous, so make sure you wash your hands before using them hands to feed your dog!
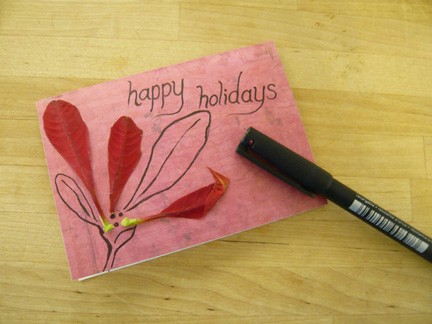
This super quick card can be made by sticking three pointsettia flower petals onto a folded piece of scrapbooking paper, drawing a couple more petals around those and then adding a holiday greeting. Don't worry about having perfect drawing or handwriting skills–the fact that you attempted this simple art piece will mean lots to family and friends!
(For drawing stuff like this, I love to use Staedtler black Lumocolor pens in the Fine thickness. You can find them in varying thicknesses at the Dick Blick website.)
On the next page, check out some glittery, fabric-embellished tins.
[
I love embellishing little boxes and tins; it can be a fun way to wrap a small gift in something that won't necessarily end up in a land fill afterwards! For these, I cut circles of a fun floral fabric for the top of the tin, and circles of green felt for the inside.

Because the felt is a little bit of a thicker material, you'll need to pay special attention when running it through the sticker maker. If you're careful and pull a little bit on the paper as you turn the crank, it should work out for you!

Add some glue around the edge of the fabric on top of the tin, and sprinkle on some glitter to hide the raw edge of fabric. I like to make crafts that aren't holiday-specific so they can be used all year round, but you could definitely make these super Christmasy by using a cute Xmas themed fabric on top!
On the next page, check out a paper-embellished earrings box.
[
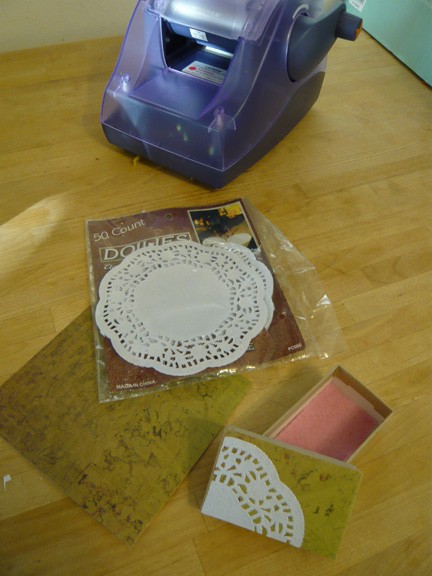
I had a plain brown earrings box that I thought could use a little pizazz! I ran another little piece of felt, pink this time, through the Create-a-Sticker for the inside of the box, and picked a scrapbook paper that looked almost like cork to put on the top of the outside of the box.

I had originally planned to put some sort of flat rhinestones through the sticker maker, but they ended up being too thick. So I busted out a bag of fun yellow feathers!
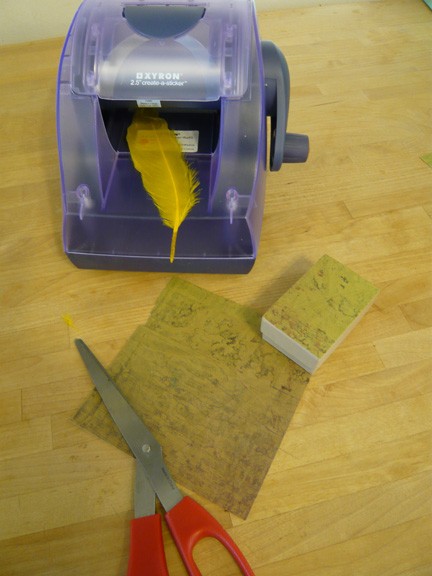
Unfortunately, feathers don't hold up so well in the Create-a-Sticker:
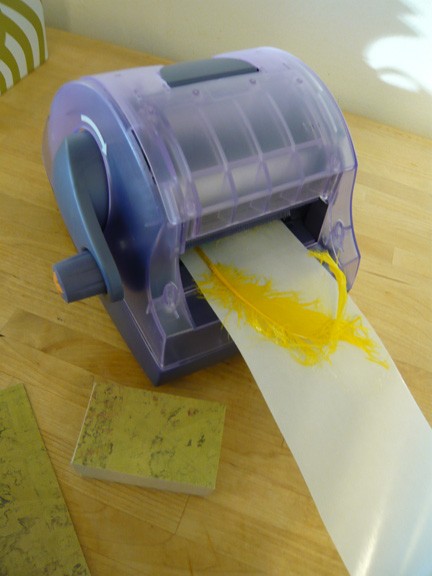
I think it's just a matter of all those little wispy feathery bits not being sturdy enough to get a solid application of the adhesive. If you're planning on doing something feathery, try spray adhesive! I have a bag of paper doilies in my craft supplies arsenal, and thought a piece of one of them could be a cute way to finish off my earrings box.
On the next page, a tiny supercute journal for your friends to keep their thoughts in, and details on how to enter to win your own free sticker maker from the folks at Xyron.
[
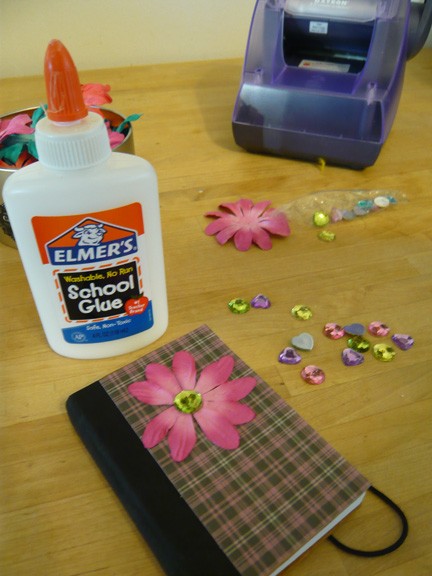
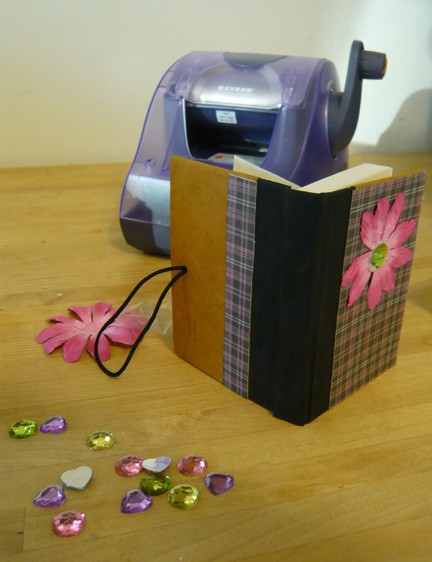
It didn't take much to transform a tiny hardbound journal into something more special–all it needed was a couple of small scraps of scrapbooking paper cut to size, a 3 dimensional paper flower, a rhinestone and some glue!
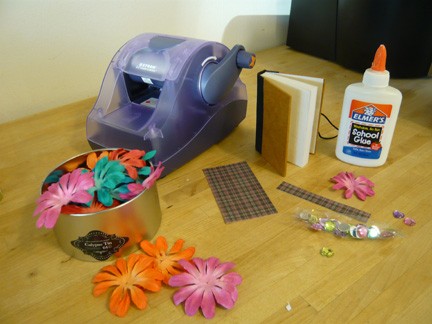
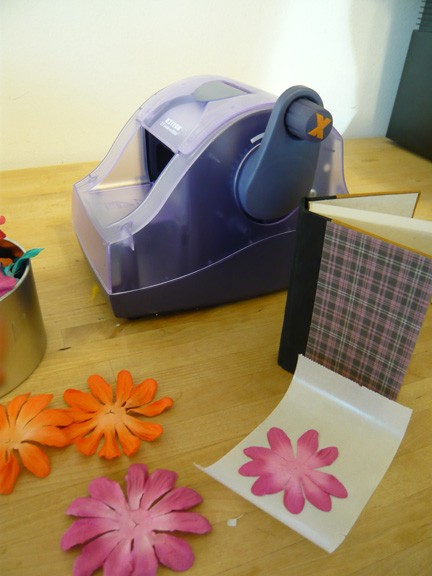
One piece of scrapbooking paper was cut down to fit the brown area of the journal's front cover. I left the black binding intact for more contrast. Then I ran a 3 dimensional paper flower through the sticker maker–it squished it flat, but the flower still had a great texture to it. Be careful not to rip it as you're peeling it off the paper backing!
A little glue on the center of the flower, stick on that rhinestone, and POW! You've got a super cute little journal!
I ran another little scrap of scrapbook paper through the sticker maker for the back of the cover to make it look more finished. If you want to get really fancy, you can cut your scrapbook paper pieces just slightly bigger than the cover so they wrap around the edges. This whole project takes about 5 minutes to do and is pretty inexpensive; you could easily knock out a bunch for your friends for the holidays without breaking the bank!
And now, without further ado, it's giveaway time! We'll have eight, count them EIGHT, winners this week. Two lucky Gettin' Made readers will win a free 2.5″ Create-a-Sticker machine from Xyron, and six will win a free 1.5″ X shaped Create-a-Sticker machine!
Leave a comment on this blog post before midnight on Friday, December 3, and you'll automatically be entered to win. What would you make with a sticker maker? What's the most out-there thing you can think of to try and add adhesive to? Share your ideas here!
Comment as much as you like, but keep in mind only one valid entry per person will be counted to keep it fair. Contest is open to United States residents only. If you've won a Gettin' Made giveaway in the last 30 days, you'll be ineligible to win so other crafty folks have a chance at awesomeness. After the contest closes, the winners will be chosen using random.org and notified by email. If you're notified that you're a winner and don't respond with a mailing address in a timely manner, another winner will have to be chosen. (So make sure he*****************@gm***.com is on your email service's safe list!) Good luck everyone, and happy commenting!